How To Make Use Of WordPress With React?
July 12, 2021
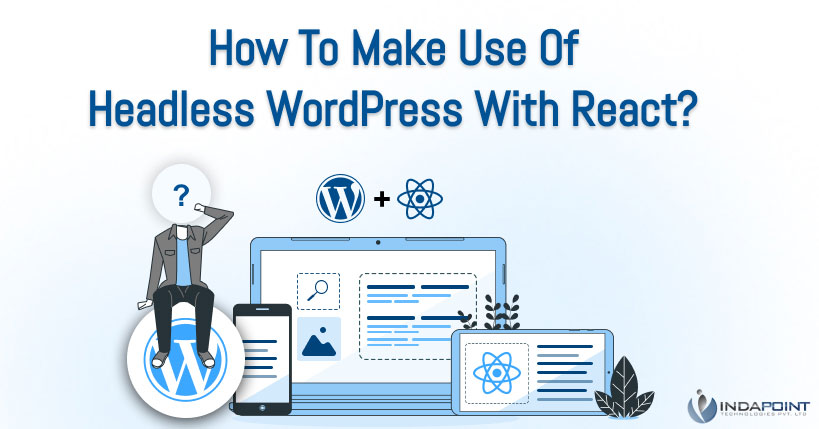
Are you looking for how to create your own website or blog to share your content with the world but are unable to do so because you lack the necessary abilities, and hiring a developer with both talents will cost you a fortune? Today, we’ll look at how to use React to create a headless WordPress site or how to make use of WordPress with react.
WordPress is an open-source content management system licensed under the GPLv2 license. You may easily design, deploy, tweak, and upgrade your own website. How to make use of WordPress with react or using WordPress with react.
WordPress is a free piece of software that anyone can use without needing to be technically knowledgeable. Companies using React are combining it with WordPress. We are the leading CMS development company in USA.
Steps To Implement Headless WordPress Using React
So, steps for using WordPress with react, The interesting fact about WordPress is that it is incredibly configurable, allowing you to personalize your website and turn it into a virtual second home where you can share your material and thoughts. So, how to make use of WordPress with react.
Step 1 – Setting up a WordPress website
WordPress with React, The first step in implementing React in WordPress with Headless CMS is to set up a WordPress site, improve wordpress page speed which will provide all of the necessary resources for creating front-end React applications. Begin by using git to install the WP-Rest API plugin’s zip file, and then uploading that zip folder to your WordPress plugins folder.
The next step is the use of WordPress with react Allow the WordPress Rest API into your ReactJS WordPress website as soon as the file is uploaded by activating the plugin. Now go to Permalinks Settings and select either Post name or Custom Structure.
Install the Postman chrome extension because we’ll be working with API calls. When you’re in the Postman, type the URL in the following format:
https://example.com/wp-json/wp/v2/posts
This link will assist you in entering information into your WordPress site.
Custom Post Type UI Plugin
To build custom post types, download the Custom Post Type UI plugin and copy it. When you utilize WordPress with React in the next phase, these posts will appear.
Install and activate the plugin, then begin creating new post types. We’ll teach you how to make a custom post type for books to help you understand it.
To begin, fill in the Post Type Slug with the name of the custom post. If you wish to use Headless WordPress, make sure the Show in the REST API option is set to True.
To receive the information you desire from the REST API, click all of the choices.
As soon as you click save, a new option will appear in the sidebar—select it to add a new book to your custom post type.
The book is finished, as you can see in the image above, with sample data included.
To see if the data is available through API, click the URL inside Postman.
Now, the URL will show up like
https://exampe.com/wp-json/wp/v2/books
As a result, by incorporating ACF and ACF into RestAPI plugins, you may now incorporate additional fields such as Publisher.
Install and activate both plugins.
WordPress plugin with react
- Advanced Custom Fields: Extended
- Advanced Custom Fields
We must now download the ACF REST API plugin as well.
Make sure you choose the appropriate post type from the drop-down menu. Then press the ‘Publish’ button.
Within your custom post type, you’ll notice a new field. That’s all there is to it when it comes to using React js with WordPress to deliver data to a ReactJS web app.Step 2 – Getting Started with React
The following needs must be installed on the computer in order to set up the React application or how to use of WordPress with react.
- NodeJS & NPM
- Text Editors such as Sublime or Visual Studio Code
- Git for Version controlling ( optional )
After you’ve installed all of the dependencies, enter the command line and type the following code to start the project using ReactJS WordPress.
npx create-react-app frontend
Now that the app has been created, change to the app folder and run the command below to install the Axios package for API calls.
npm i axios
Then, inside your chosen text editor, click on the folder.
Run the command npm start to start the application.
Now we’re ready to use headless WordPress ReactJS to build a web application.
Create a new folder called ‘components’ inside the src folder, and a new file called ‘Books.js’ inside the ‘components’ folder. It’s a crucial component of Headless WordPress With React.
Step 3: Rendering Post Data On ReactJS
From the Book.js file, you may access data from the WordPress Rest API. The code below will make a request to the Rest API end-point – in this case, ‘/books’ – and return data in JSON format.
import React, { Component } from 'react'

import axios from 'axios';

export class Books extends Component {

   state = {

    books: [],

    isLoaded: false

   }

 componentDidMount () {  axios.get('https://wordpress-179008-1030625.cloudwaysapps.com//wp-json/wp/v2/books/')

    .then(res => this.setState({

        books: res.data,

        isLoaded: true

    }))

    .catch(err => console.log(err))

   }

   render() {

   console.log(this.state);

    return (

    )

   }

}
export default Books
The above code displays a sequence of data in the console, which is subsequently used within the render block.
Now, as seen below, call the Books component from within the App.js file.
import React from 'react';

import './App.css';

import Books from './components/Books';

function App() {

 return (

   <div className="App">

 <Books/>

   </div>

 );

}
export default App;
Because App.js is the entry point of our web application, it is required to refer to the “Books” section of this file.
Step 4: Displaying Post Data on ReactJS
Include the following code in the render method to display the data.
render() {

    const {books, isLoaded} = this.state;

    return (

        <div>

            {books.map(book =>

               <h4>{book.title.rendered}</h4>

            )}

        </div>

    );

   }
Rather than displaying data here, you can create a new component to segregate it from the parent. It should be called “BookItems.js.”
Inside Bookk.js, change the render method to something like:
render() {

    const {books, isLoaded} = this.state;

    return (

        <div>

            {books.map(book =>

            <BookItems key={book.id} book={book}/>

            )}

        </div>

    );

   }
Instead, we must render the BookItems component.
Inside the BookItems.js add the following code:
import React, { Component } from 'react'

import axios from 'axios';

import PropTypes from 'prop-types';

export class BookItems extends Component {

   render() {

    const { title } = this.props.book;

    return (

        <div>

           <h2>{title.rendered}</h2>

        </div>

    )

   }

}
export default BookItems
Refer to the book prop in the code to acquire the title and other information about the book.
Make sure the BookItems component is referenced within the “Books” component.
Now, the final version of BookItems.js looks something like this:
import React, { Component } from 'react'

import PropTypes from 'prop-types';

import axios from 'axios';

export class BookItems extends Component {

   state = {

    imgUrl: '',

       author: '',

    isLoaded: false

   }

   static propTypes = {

    book: PropTypes.object.isRequired

   }

   componentDidMount () {

    const {featured_media, author} = this.props.book;

    const getImageUrl = axios.get(`https://wordpress-179008-1030625.cloudwaysapps.com//wp-json/wp/v2/media/${featured_media}`);


    const getAuthor = axios.get(`https://wordpress-179008-1030625.cloudwaysapps.com//wp-json/wp/v2/users/${author}`);

    Promise.all([getImageUrl, getAuthor]).then(res => {

        console.log(res);

        this.setState({

            imgUrl: res[0].data.media_details.sizes.full.source_url,

            author: res[1].data.name,

            isLoaded: true

        });

    });

 }

   render() {

    const { title, excerpt } = this.props.book;

    const {author, imgUrl, isLoaded} = this.state;

    return (

{title.rendered}

              {author}

    )

   }

}
export default BookItems
And because styling has not been done in this example, the result in the browser will not appear as well as it might; nevertheless, you can change the output by styling it according to your needs.
Headless WordPress Using WordPress REST API Plugin & React
Step 1 – Create a New WordPress Installation
Using WordPress with React, There are numerous resources available on the internet for setting up a WordPress installation. You might not have the fundamental needs and local setup if you haven’t done this previously.
This is a crucial phase in the Headless WordPress With React development process.
There are other options, but MAMP and DesktopServer are among the best and most widely used.
These ready-to-use options are ideal for getting started quickly. After you’ve completed the WordPress installation, go to the following link to access your admin dashboard.
http://your-site.dev/wp-admin
Step 2 – Installing WordPress Rest API Plugin
The next step using WordPress with React is the WordPress plugin with react, If your WordPress installation is older than 4.7, you’ll need to do this step. The version details can be found in the dashboard. You’re good to go if you have e version 4.7 or higher.
If your WordPress version is less than 4.7, go to the plugins page, add new, and search for “WordPress REST API (Version 2)”. All you have to do now is install it and activate it, and you’re ready to go.
Step 3 – Sanity Check
Take a look at your preferred API request tool. If you want, you can switch to the Terminal Window. Request http://your-site.dev/wp-json/ using a GET request.
You should get a JSON response back. This response contains all of the information about the resources and end-points on your WordPress site.
Send a request to http://your-site.dev/wp-json/wp/v2/posts/1 if you want a Demo.
You’ll get a response from JSON with all the details of “HELLO WORLD,” the default test post that comes with all new WordPress installations.
Step 4 – Install all plugins for the project
The plugins required for the Demo Project must be installed. This step can be completed after you have downloaded the relevant Plugins. You can also look for and download these plugins.CPT UI
CPT, or Custom Post Types, is WordPress’ greatest and most powerful feature. It enables you to build custom content kinds, as the name says. It also extends well beyond WordPress’s usual posts and pages.
We’ll call the CPT we make for the demo project Movies.
There are two approaches to this.
Manually
Instantly
If you want to do it instantly just copy and paste the command below:
{"movies":{"name":"movies","label":"Movies","singular_label":"Movie","description":"","public":"true","publicly_queryable":"true","show_ui":"true","show_in_nav_menus":"true","show_in_rest":"true","rest_base":"movies","has_archive":"false","has_archive_string":"","exclude_from_search":"false","capability_type":"post","hierarchical":"false","rewrite":"true","rewrite_slug":"","rewrite_withfront":"true","query_var":"true","query_var_slug":"","menu_position":"","show_in_menu":"true","show_in_menu_string":"","menu_icon":"","supports":["title","editor","thumbnail"],"taxonomies":[],"labels":{"menu_name":"","all_items":"","add_new":"","add_new_item":"","edit_item":"","new_item":"","view_item":"","search_items":"","not_found":"","not_found_in_trash":"","parent_item_colon":"","featured_image":"","set_featured_image":"","remove_featured_image":"","use_featured_image":"","archives":"","insert_into_item":"","uploaded_to_this_item":"","filter_items_list":"","items_list_navigation":"","items_list":""},"custom_supports":""}}Let’s have a look at how we can do it manually next.
- Select Add/Edit Post Types from the CPT UI.
- For the Post Type slug, type movies. This URL slug will be used by WordPress.
- Enter movies with a plural label. Enter the movie with a single label.
It’s important to remember that the “Show in REST API” option must be set to true ( which is in default as false). You’ve also added movies in the “REST API base slug” just below this option.
To add a new post type, scroll all the way down and select Add Post Type.
In the sidebar, you should now see a Movie choice.
In addition, we can add custom fields to our project. Advanced Custom Fields is a WordPress React Custom Fields plugin.
To expose your custom feed to API, you must first install the ACF to the REST API community, which will expose your custom feed to API right away.
Step 5: Post Data Format
This is the final phase in the data collection process. You must first import all of the movies. You’ll see a link to start the importer after the installation is complete.
They’ll now ask you to designate an author to the imported posts. All you have to do now is add your default admin account and submit it.
Movies must be seen, and then ‘all movies’ must be seen. Locate the movie list that you entered. The visuals for the films are also available.
Step 6 – Install Create React APP
You must have Node and npm installed on your system to complete this step. All you have to do now is run this command.
npm install -g create-react-app
Voila! You’re all set to utilize Create React App. This is a necessary component of the React JS WordPress combination.
Step 7 – Create an App
Go to the directory where the front-end will be created and run the following code:
create-react-app headless-wp
It takes a while, but once it’s done, you’ll be able to cd into the new headless-wp directory. Now type in the following code:
npm start
This command will start a Webpack Dev Server and redirect you to http://localhost:3000 in your browser.
Step 8 – Create a Component
- It’s pretty simple to make a component. Rather than making one, we’ll edit our existing components by following these procedures.
- Delete all of the current App.js component codes.
- Make a render() function for this component now.
- Let us now retrieve the Star Wars movie data that we saved in WordPress.
- The function Object() { [native code] }() and componentDidMount procedures have been added to the render() function (). We should initialise the state in function Object() { [native code] }(). After the component mounts, componentDidMount() is called.
- We’ll now take the answer and parse it into JSON, which we’ll then push into our state object. Because of the change in state, our component enters by using the render() function.
- Add some extra code to the render() function to make it accept JSON in our state.
- Map each movie to its corresponding div and save the results in the movie variable of our render() method.
 Conclusion
Now you know using react js with WordPress.You now know everything there is to know about WordPress and why it is so popular.
WordPress’s numerous advantages contributed to its popularity, which is why it is so well-known. React and WordPress are a formidable team!
You’re also aware that combining React with WordPress can provide amazing results. With WordPress and React, you can accomplish a lot of different things.
You should not stop with these fundamentals. Explore the possibilities that React and WordPress may offer.
We hope you enjoyed reading this post and that it will be of great use to any React JS development company in the near future or hire react js developers in India. We are the leading WordPress Development Company in India.


